If you are using a desktop computer these are located on the right hand side of the page, if however you are using a mobile device then the button is located at the bottom of the screen.
By clicking on this button it will take you to the Create Post page.
Section 1: This section is optional and is only required if you would like to schedule the post to be sent more than once.If you do wish for your new post to be added to one or more Categories, select as many Categories as you wish here.
Tip: Recycling your post will increase the amount of people who read it.
Section 2: This section lists all your social media and blog accounts that you have connected to GOYakka.By default none of the Accounts are selected so you will need to click on one or more of the Accounts you wish this post to use.
Tip: There isn’t any restriction on the amount of Accounts you can select.If you select one or more of the same type of Account, for example two Twitter accounts, section 3 will only display one text box.However, if you select more than one type of account, say one Twitter and one Facebook account, a text box will be displayed for each type.This will allow you to create the same or different posts depending on the social media or blog network.
Tip: This is a very quick way to create different versions of the same post for each network.
Section 3: This section will display all the text boxes for each type of account as mentioned above. There is the icon for each type of social media or blog network next to each text box.
Tip: Remember if you have selected more than one of the same network (ie: Twitter) it will only display one text box.If you enter a full website address into the text box GOYakka will display all of the available images which are on that page which can be attached to your posts. These are automatically gather from the URL supplied.For Twitter posts you can attach a maximum of four images (restricted by Twitter).If you prefer to upload your own image to attach to the post you can use the GO ADD IMAGE button.The ADVANCED button will offer further options for your post.
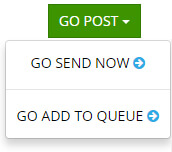
Once your post is ready you can either send it immediately or add to a Categories queue to be sent via your schedule. On a desktop computer these green SEND buttons can be found at the bottom right of the page.
For mobile devices two green buttons will be displayed at the bottom of your screen.